Table Of Content
Anyone with straight hair can use these foolproof methods to make sure your DIY cut is nice and even. Bring hair to the front and snip at an angle or straight, depending on if you prefer a rounded or blunt shape to your cut. Dull edges on household scissors could potentially give you even more split ends (plus, ew, cross-contamination). Now that you've got the basics down, we've rounded up the best instructional videos below to help you cut your own hair at home, no matter what kind of cut you're looking for. Now that you know what tools you need and the basics of trimming, here are a few tutorials that will give you a visual and step-by-step breakdown of exactly how to trim every hair type.
Straight and Wavy Hair Types
You’ll mostly be working with the front and top portions of your hair to create bouncy and beautiful layers. Leaving the bottom part unlayered will help keep your hair full and voluminous. With this in mind, I will start the layers between my cheekbones and chin. Starting just below the chin will always be your safest bet if you have extra long hair.
How to cut your own bangs:
Follow along as YouTuber Vivi König very carefully gives her bangs some TLC. She recommends styling your hair prior to your trim—that way you have a better idea of the true length you’re working with. It’s no secret that bangs are kiiinda high maintenance—even though they might skim your brows perfectly post-haircut, there’s a good chance they’ll be hitting your eyelids in a month or two. Committing to DIY bang trims—and this tutorial for straight hair is a great place to start.
Tips
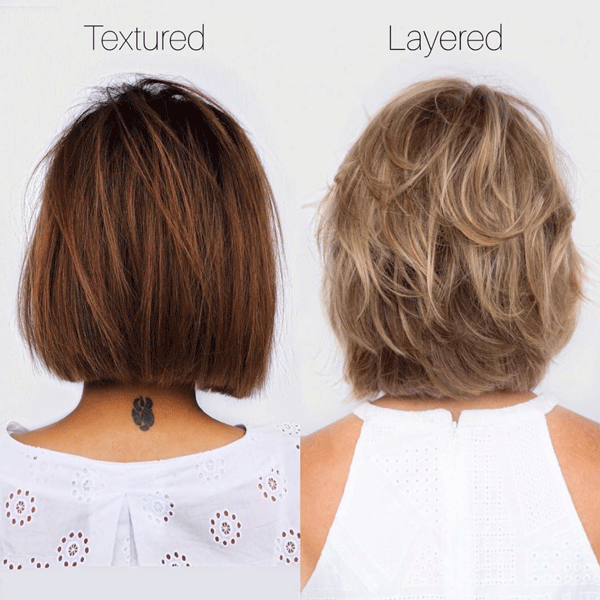
Layers add volume to thick, heavy hair that would otherwise lay flat due to its weight. Conversely, they give a boost to thin hair by adding dimension. Cutting layers into your hair also revives and freshens an existing style. An undercut style is by far the easiest haircut to try at home and it can make a huge difference in managing and cutting thick hair.
To trim your hair at home, start by sectioning your hair into at least four sections. Divide your hair in half from ear to ear, tie or pin the top half up, and then section the top half and the bottom half into their own sections with a hair tie, scrunchie, or clip. “It helps you focus and will help you trim to the same length in each section,” says Brown. And if you have really long or thick hair, Brown says you can take it a step forward and divide each of those four sections in half too. Similar to short cuts, Arrunategui says if your bangs grow in don’t get scared of them and embrace new ways of wearing your hair.
Everything You Need to Know About Layered Haircuts
TikTokers Are Putting This Two-Step DIY Butterfly Cut Technique To The Test And The Results Are Surprising - Grazia
TikTokers Are Putting This Two-Step DIY Butterfly Cut Technique To The Test And The Results Are Surprising.
Posted: Fri, 06 Jan 2023 08:00:00 GMT [source]
It is just as important as having the right tools because cutting your own hair can be nerve-wracking. The most important part of this step is making sure that the line between the section that you’ve tied up and the hair you’ve left down is super straight and symmetrical. Once you’re happy with the line, chop the bulk of the loose hair off with scissors and then shave it with clippers. Basically, you simply need to buzz cut your own hair at a definite area of your head (most often, the nape).
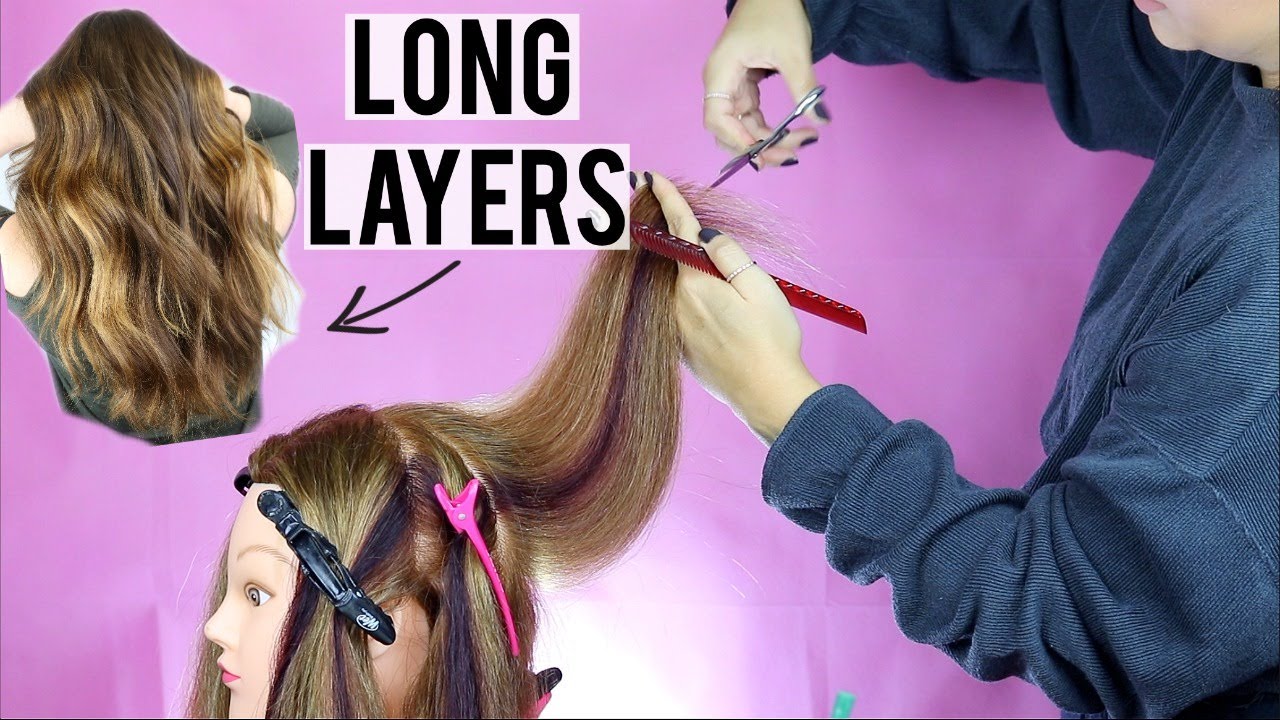
But if you’re already about to scroll past my warnings and disclaimers and just do the dang thing yourself, then fine, I get it, and I’ve been there. As mentioned above, the best layers for you will depend on your hair type, face, shape, and commitment to styling and maintenance. If you’re not sure what kind of layers will be most suitable, scroll through your socials. Make sure you keep the layers in the back sections as long or longer than the other sections. Create these layers by trimming small sections of hair with the scissors. Divide your hair into sections by layer to ensure that the layers on both sides of your head are the same length.
How to Trim Your Own Split Ends
We can gradually separate our layers by point-cutting directly into a single spot. Getting a perfectly even DIY cut can be tricky, but this tried-and-true method for achieving layers at home is great for beginners. Smooth hair into a ponytail at the top of the hairline near the forehead (hence the "unicorn ponytail" method), pull hair forward and snip ends. The sharper the angle, the more drastic the face-framing layers will be.
Learning to trim the nape of your head will also be useful if you’re trying to maintain or grow out a pixie cut. First and foremost, your main tool will be a pair of sharp hair scissors. Be sure to invest in a fine-tooth comb, as it is essential to smooth out disobedient hair before every snip. Then, a hand-held mirror is useful to check the back of your hair. You’ll also need a few sturdy hair clasps, bobbles, and a water spray for keeping your hair damp while trimming. While a salon appointment with a trained hairstylist is the safest way to go for any kind of haircut, sometimes you gotta do it yourself—and that’s okay.
Face framing layers open things up and highlight one's facial features. With most of your hair clipped back, take a moment to notice your face shape and the features you want to highlight. My face shape is square, and for best results, I typically like front layers to accentuate my cheekbones. “Regular trims, every six to eight weeks, prevent layers from looking uneven or losing their intended shape,” Rosales says. But if it is getting to the point where your bangs are driving you insane, chip into them with extra caution since bangs are the frame to your face.
Create a part on the left side of your head and the right side of your head. The section of hair between these two parts is the “top box” section. Watch this video to see how you can get some cute fringe bangs to completely change up your look. So, before you start snipping, separate the top two-thirds of your hair and clip away the bottom one-third of your hair. The shortest point to begin your face framing layers is at the same level as your nose or cheekbones. Ensuring the hair and scalp are clean is the key to doing this correctly.
Use professional salon hair clips to firmly secure each section. After all, you need to see exactly what you’re doing, especially if this is your first time cutting your own hair. You’ll also need a room with access to a sink and two mirrors — ideally, one wall mirror and one mirror you can use to see the back of your head. Have you considered all the previous points and decided that a cut with layers is right for you? If the answer is “yes,” these instructions will help you achieve the perfect layered haircut.
And FWIW, I’m not just trying to be a bummer or crush your impulsive 11 p.m. I-want-new-hair-right-now dreams—I just want you to do what’s best for your hair, k? “A trim is definitely better if you go with a pro,” says hairstylist Kamara Brown Lewis.
Then, pin up any other wisps of hair that you don’t want to be as short as the hair around your ears and at the nape of your neck. Next, take a deep breath and go to work on the loose hair with clippers. This YouTuber shares her trimming technique for her gorgeous natural locks.


No comments:
Post a Comment